
Turn Your Phone into a Webcam: Best Apps, Pro-Quality Settings, and a Complete Setup Guide
If you’re working remotely, streaming, or joining frequent video calls, turning your phone into a webcam is one of the smartest upgrades you can make. Modern smartphones pack high-quality sensors, powerful image processing, and advanced stabilization that outperform many built-in laptop webcams. With the right app, cable or Wi‑Fi setup, and a handful of quality tweaks, you can achieve crisp, flattering video that looks professional in Zoom, Google Meet, OBS, Teams, or any livestream platform.
Below is a comprehensive guide to the best apps, the most effective quality settings, lighting and audio tips, and troubleshooting steps—optimized for SEO and built to read naturally.
Why Use a Phone as a Webcam?
- Better image quality: Larger sensors and smarter computational photography.
- Flexible placement: Use tripods and phone clamps to frame the perfect angle.
- Cost-effective: Skip buying a dedicated webcam—re-use hardware you already own.
- Platform‑agnostic: Works with Zoom, Meet, Teams, Discord, and streaming software like OBS.
Best Apps to Turn a Phone into a Webcam
Choose an app that supports your operating system, preferred connection type, and desired controls (resolution, bitrate, FPS, manual exposure, etc.).
- For iPhone to Mac
- Continuity Camera (built‑in on macOS Ventura+): Zero-install, low-latency, excellent quality. Offers Desk View, Studio Light, and Center Stage.
- Cross‑platform (iOS/Android to Mac/Windows)
- EpocCam: Simple setup, supports wireless or USB, integrates with most conference apps.
- Camo: Pro-grade controls (exposure, white balance, ISO, focus, LUTs), virtual background, portrait mode; robust on both Mac and Windows.
- DroidCam: Lightweight, reliable, supports USB, Wi‑Fi, and NDI; great for OBS users.
- Iriun: Quick install, up to 4K support depending on device; minimal overhead.
- For creators and livestreamers
- OBS + DroidCam OBS plugin or NDI Tools: Flexible routing, scene mixing, multi-cam.
Tip: Prefer USB when possible—wired connections are lower latency and more stable than Wi‑Fi, especially on congested networks.
Ideal Video Settings for Professional Quality
Fine‑tuning your camera settings can dramatically improve clarity, color fidelity, and motion handling.
- Resolution: 1080p (Full HD) is the sweet spot for live calls. Use 4K if recording locally or streaming at higher bitrates for later edits.
- Frame rate: 30 fps for most calls; 60 fps for fast motion or gaming streams. Keep it consistent to avoid jitter.
- Bitrate: If adjustable, set 6–10 Mbps for 1080p30. For 4K30, 20–30 Mbps is safer (when recording or NDI). Conference apps often compress—feed them the cleanest signal you can.
- Exposure: Lock exposure to prevent brightness shifts when you move. Slightly underexpose rather than blow highlights.
- White balance: Lock WB to a preset (e.g., 5600K for daylight, 3200K for warm lamps). Avoid auto WB to prevent color “breathing.”
- Focus: Use manual focus or tap‑to‑focus on your face, then lock. Autofocus hunting is distracting.
- HDR: Disable for video calls in mixed lighting. HDR can cause flicker or odd tone mapping through compression.
- Stabilization: Not needed when the phone is fixed on a tripod; disable to avoid micro‑warping.
- Lens choice: On multi‑lens phones, pick the main (wide) lens—usually the best sensor and optics.
Lighting: The Fastest Upgrade
Lighting has more impact on perceived quality than resolution alone.
- Key light: A soft, front‑facing light at 30–45° angle to your face. A window works; otherwise, use an LED panel with diffusion.
- Fill light: Optional, dimmer light on the opposite side to soften shadows.
- Back light (hair/rim): Adds separation from the background; a small lamp behind you works wonders.
- Avoid mixed color temperatures: Keep all lights similar (e.g., all daylight 5600K) to maintain consistent skin tones.
- Positioning: Keep lights slightly above eye level to reduce glare and under‑chin shadows.
Audio: Don’t Neglect Sound
Audiences forgive imperfect video, not bad audio. Improve clarity with:
- External mic: A USB mic (e.g., Samson/Q2U, Blue Yeti) or a Lavalier plugged into your phone/computer.
- Room treatment: Reduce echo with curtains, rugs, bookshelves. Face away from bare walls.
- Mic placement: 15–30 cm from your mouth, just off-center to limit plosives.
- Monitoring: Do a quick test recording to catch noise, clipping, or latency before going live.
Mounting and Framing
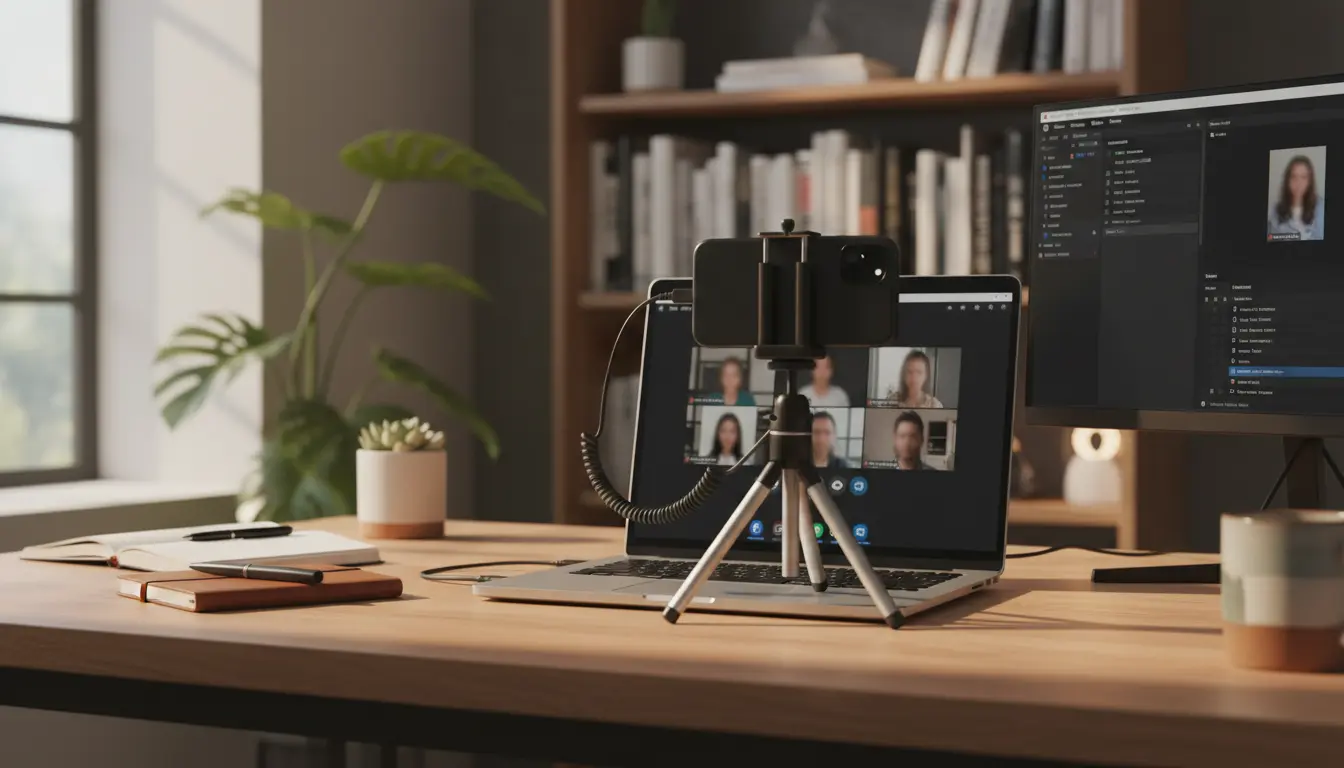
- Tripod + phone clamp: Rock‑solid stability and precise height control.
- Eye‑level: Raise camera to eye height; angle slightly downward for a flattering perspective.
- Distance: An arm’s length works well; crop to head‑and‑shoulders for calls.
- Background: Clean, uncluttered, with a bit of depth. Add a plant or bookshelf for visual interest; avoid strong backlight from windows.
- Rule of thirds: Position eyes along the top third line for a natural composition.
Connectivity and Performance Tips
- Prefer USB over Wi‑Fi for stability and minimal latency.
- If you must use Wi‑Fi, connect both devices to the same 5 GHz network and minimize other traffic.
- Close heavy apps on the phone and computer to avoid thermal throttling.
- Plug your phone into power for long sessions; disable battery‑hungry features.
- Enable “Do Not Disturb” on the phone to avoid notifications on camera.
Platform‑Specific Setup Notes
- Zoom/Meet/Teams: After installing your chosen app, select its virtual camera in video settings. Test audio input separately to ensure sync.
- OBS Studio: Add a Video Capture Device source and select your virtual camera; adjust resolution/fps in source properties. Use filters for color correction or noise reduction.
- macOS Continuity Camera: On iPhone, enable Continuity Camera; on Mac, select iPhone in app video settings. Use Studio Light for subtle face illumination in dim rooms.
Color and Image Tuning (Optional but Powerful)
- Skin tones: Slightly warm white balance is often flattering.
- Contrast: Avoid extremes; gentle contrast preserves detail after compression.
- Sharpness: Keep modest—over‑sharpening creates halos, especially after Zoom/Teams encoding.
- LUTs/Profiles (Camo/OBS): Use neutral looks for work calls; cinematic LUTs for content creation.
Privacy and Safety
- Lens cap or cover when not in use; or switch to a dummy scene in OBS.
- Lock your phone screen rotation and disable lock screen timeouts during calls.
- Be cautious with apps that request excessive permissions; review privacy settings.
- Keep your OS and apps updated for security and stability.
Troubleshooting Common Issues
- Video not recognized: Reinstall desktop drivers, restart the conferencing app, try another USB port, or toggle camera permissions.
- Stutters or lag: Switch to USB, reduce resolution to 720p, close background tasks, or lower frame rate to 30 fps.
- Color shifts: Lock white balance; avoid mixed lighting sources.
- Audio/video desync: Use the same device for both or apply a sync offset in OBS; minimize wireless hops.
Quick Starter Checklist
- Pick a stable app (Camo, DroidCam, EpocCam, Continuity Camera).
- Use USB whenever possible.
- Mount phone at eye level with a tripod and clamp.
- Lock exposure, white balance, and focus.
- Add a soft key light; tidy the background.
- Use an external mic; test levels.
- Do a 30‑second test recording before going live.
Final Word
Turning your phone into a webcam is a practical, budget‑friendly way to elevate your on‑camera presence. With a stable app, wired connection, basic lighting, and a few locked camera settings, you’ll look sharper and more professional than most standard webcams can deliver.