
Mobile Macro Photography: Lens Attachments and Lighting Techniques for Stunning Close-Ups
Mobile macro photography opens up a world where tiny details become monumental—textures of a leaf, the facets of an insect’s eye, the crystalline geometry of water droplets. With today’s smartphones, you don’t need a dedicated DSLR and a pricey macro lens to capture mesmerizing close-ups. What you do need is a clear understanding of lens attachments, lighting strategies, stabilization, and workflow. This guide walks you through the essentials to produce crisp, organic, and professional macro images with your phone, while staying fully optimized for search with natural, semantically relevant phrasing.
Why Macro on Mobile?
Smartphones have increasingly capable sensors and computational photography features. Paired with a good macro lens attachment and thoughtful light control, they can reveal textures and details that are invisible to the naked eye. Mobility and spontaneity are huge advantages—macro subjects are everywhere: kitchen spices, fabric fibers, jewelry, moss, flowers, coins, and even everyday tools.
Choosing a Macro Lens Attachment
Not all macro lenses are created equal. The right attachment amplifies fine detail without introducing heavy distortion or chromatic aberration.
- Clip-on vs. magnetic mounts:
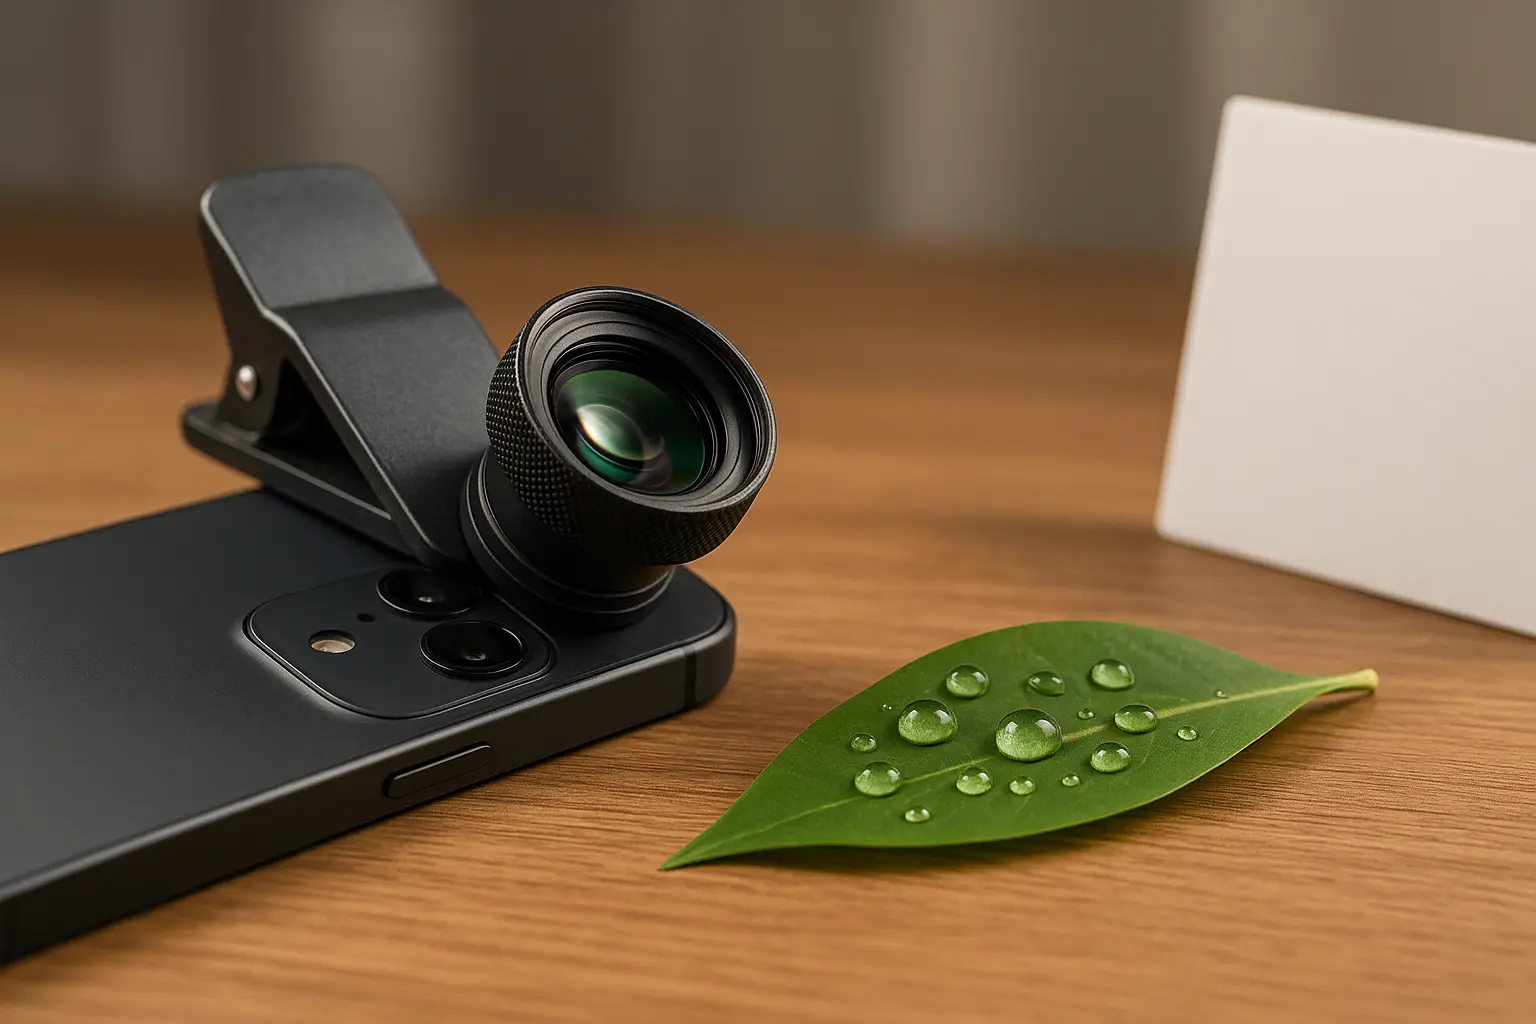
- Clip-on lenses are universal and quick to install, but can misalign if the clip shifts.
- Magnetic or bayonet mounts provide consistent alignment and better edge sharpness if your phone case supports them.
- Magnification and working distance:
- A 10x to 15x lens is a practical sweet spot for mobile use. Higher magnification often cuts working distance dramatically, making lighting harder and focusing more finicky.
- Look for lenses that specify a clear working distance (e.g., 2–4 cm), so you can plan lighting placement.
- Optical quality and coatings:
- Multi-element glass designs with anti-reflective coatings reduce glare and fringing.
- Avoid plastic optics when possible; glass typically yields better contrast and micro-contrast (the perception of fine detail).
- Compatibility with multi-camera phones:
- Ensure the lens aligns with your primary camera, not the ultra-wide or telephoto unless the attachment is designed for them. Test alignment by opening the camera and switching lenses to confirm the clamp position.
Pro tip: If your lens kit includes a diffuser or mini hood, use it. It can mitigate flare and improve contrast in backlit scenarios.
Dialing in Focus and Stability
Macro magnification magnifies camera shake and minuscule focus errors.
- Manual focus and focus peaking:
- If your camera app offers manual focus, use it. Focus peaking (highlighting in-focus edges) is incredibly helpful. Apps like Halide (iOS) or ProCam X (Android) provide granular control.
- Rocking technique:
- Set a fixed focus distance, then gently rock your body or the phone forward and backward a few millimeters to find the tack-sharp plane. Shoot bursts to increase the odds of a perfect frame.
- Tripod and macro rail:
- A small tabletop tripod with a phone clamp stabilizes your setup. A compact macro focusing rail allows micro-adjustments without touching the screen.
- Shutter control:
- Use a Bluetooth remote or the phone’s timer to avoid vibration. Even a 2-second timer can make a noticeable difference.
Mastering Mobile Macro Lighting
Light is the decisive factor in macro clarity, texture, and mood. Because working distance is short, your phone or your hand can easily block light. Plan illumination first.
- Natural light strategies:
- Open shade is a gift—soft, even, and low-contrast. Position your subject near a bright window or under tree shade to avoid harsh highlights.
- Use a white card or a simple paper reflector to bounce window light back into shadows. A curved reflector can create a soft wraparound effect.
- Continuous artificial light:
- Compact LED panels or clip-on ring lights give consistent output and are easier than flash for beginners. Aim for high CRI (95+) to maintain accurate color.
- Position lights at an angle to reveal texture (raking light). For glossy subjects, slightly offset the light to avoid specular hotspots.
- Diffusion is everything:
- A small sheet of tracing paper, frosted plastic, or a mini softbox attachment can transform harsh LEDs into creamy, shadow-soft light.
- For extreme close-ups, a “macro dome” or DIY diffuser surrounding the lens evens out light and reduces reflections.
- Using phone flash wisely:
- Built-in flashes are often too direct. If your lens kit supports a ring flash or micro softbox, you can tame specularity and flatten shadows.
- Backlighting and translucency:
- Leaves, petals, and thin materials glow when backlit. Place a light source behind the subject and a reflector in front to balance exposure.
Pro tip: Keep ISO low when possible for cleaner files. Increase light intensity or use a tripod to allow slower shutter speeds without blur.
Exposure, White Balance, and Color
Macro subjects are rich with subtle hues and micro-contrast.
- Exposure lock:
- Lock exposure and focus (AE/AF lock) once you’ve framed your subject to prevent the camera from hunting and changing brightness mid-shot.
- White balance control:
- Manually set white balance when using mixed lighting. Warmer settings flatter organic subjects like wood or flowers; neutral settings serve product details and metals.
- RAW capture:
- If your phone supports RAW (DNG), enable it. RAW preserves highlight and shadow detail, giving you more latitude in post.
Composition for Compelling Macro Shots
Magnification alone doesn’t make a photo memorable—composition and storytelling do.
- Simplify the frame:
- Remove distractions. A clean background (paper, fabric, wood) emphasizes your subject.
- Perspective and plane:
- Align the sensor plane parallel to the most important surface to keep more of it in focus at macro distances.
- Rule of thirds and leading lines:
- Position key details on intersecting points. Use natural lines (stem, vein, edge) to guide the viewer’s eye.
- Negative space:
- Give the subject breathing room to convey scale and elegance.
- Color harmony:
- Complementary colors (e.g., green leaf with red accent) create visual energy. Analogous palettes feel calm and organic.
Depth of Field and Focus Stacking
At macro distances, depth of field is razor thin—even on smartphones.
- Single-shot DOF control:
- Step back slightly and crop later to increase DOF subtly. Use smaller apertures if your phone’s camera supports variable aperture (rare but emerging).
- Focus stacking:
- Capture a series of frames focusing from front to back. Some third-party apps assist with guided stacking. You can merge stacks in desktop software for maximum sharpness across the subject.
- Motion caution:
- Stacking works best with non-moving subjects and controlled light. Even a breeze can misalign frames—shoot indoors when possible.
Post-Processing Workflow
Treat your macro like a miniature product shoot: polish matters.
- Global adjustments:
- Fine-tune exposure, contrast, and white balance first. Protect highlights on reflective surfaces.
- Local enhancements:
- Use selective clarity or structure to emphasize textures. Avoid over-sharpening—haloing ruins the organic look.
- Noise reduction:
- Apply gently, prioritizing smooth backgrounds while preserving edge detail on the subject.
- Color grading:
- Keep it natural for botanical and scientific subjects. For creative work, introduce subtle tonal curves and split toning to add mood.
- Crop and aspect:
- Square crops suit symmetrical subjects; 4:5 or 3:2 offer storytelling balance. Maintain enough negative space for social media captions or titles.
Practical Shooting Checklist
- Clean the phone lens and the attachment glass.
- Align the macro lens precisely over the primary camera.
- Stabilize: tripod + timer or remote.
- Choose soft, diffused light; add reflectors.
- Lock exposure and white balance.
- Use manual focus and rock to the focus plane.
- Shoot in bursts and, when needed, bracket focus for stacking.
- Review at 100% magnification to confirm critical sharpness.
Ethical and Organic Practices
“Organic” here means authentic and respectful. Avoid disturbing living subjects—especially insects and plants. Use natural perches rather than moving wildlife for convenience. Preserve habitats and leave no trace. Authentic textures and honest color renderings build trust with your audience and align with sustainable, nature-positive values.
Troubleshooting Common Issues
- Soft images:
- Increase stability, improve light, and check lens alignment. Lower ISO or add more diffusion.
- Harsh reflections:
- Adjust light angle, add diffusion, and try a polarizing film if your attachment supports it.
- Color casts:
- Set manual white balance or correct in post with a gray reference.
- Vignetting or blur at edges:
- Center the subject, step back slightly, or upgrade to a lens with better edge performance.
By understanding the interplay of optics, light, and micro-movements, you can transform a smartphone into a powerful macro tool. Keep your setup simple, your light soft, and your compositions intentional. With consistent practice, your close-ups will feel immersive, detailed, and genuinely organic—inviting viewers to experience the extraordinary within the ordinary.
Best Smartphones for Macro Photography
1. iPhone 15 Pro / Pro Max:
Delivers true macro shots as close as 2 cm, with exceptional sharpness, color accuracy, and support for ProRAW. Highly compatible with third-party macro lens attachments.
2. Google Pixel 8 Pro:
Features outstanding computational photography, precise autofocus, and natural color rendering. Excellent noise reduction and RAW capture make it great even in low light.
Samsung Galaxy S24 Ultra:
Offers tele‑macro‑like focus, crisp detail, and versatile camera control — a great all‑rounder for macro enthusiasts.