
Why hardwire your home network?
If you’re in the United States and want dependable, high-speed internet for streaming, gaming, home offices, smart TVs, and security systems, wired Ethernet beats Wi‑Fi for stability, latency, and throughput. Cat6 and Cat6a cabling are the current sweet spots for most homeowners. This guide explains what to buy, how to plan, and how to install Cat6/Cat6a cleanly, safely, and in a code-conscious way.
Cat6 vs. Cat6a: What’s the difference?
- Bandwidth and speed:
- Cat6: Up to 10 Gbps at shorter runs (commonly rated 10G up to 55 m/180 ft), 1 Gbps up to 100 m.
- Cat6a: True 10 Gbps up to 100 m (328 ft) with better noise resistance.
- Shielding and diameter:
- Cat6a often has thicker jackets and can be shielded (F/UTP, U/FTP, S/FTP), improving performance in noisy environments but making it less flexible and harder to terminate.
- Use cases:
- Cat6 is great for most single-family homes with 1 Gbps service or short 10G backbones.
- Cat6a is ideal for future-proofing, especially if you plan 10G networking, run cables near electrical lines, or have long runs.
Tip: For most U.S. residential builds and remodels, Cat6 is cost-effective. If you’re opening walls or building new, consider Cat6a for a decade-plus of headroom.
Solid vs. stranded conductors
- Solid copper conductors (23 or 24 AWG) are best for in-wall permanent runs (horizontal cabling). They’re easier to punch down on keystone jacks and patch panels.
- Stranded conductors are more flexible for patch cords but not ideal for in-wall use.
Always choose 100% copper conductors. Avoid CCA (copper-clad aluminum) for safety, performance, and code considerations.
Plenum vs. riser vs. general purpose jackets
- CMP (plenum): Required for air-return spaces; highest fire safety rating; more expensive.
- CMR (riser): Suitable for vertical runs between floors and typical in-wall residential use where plenum isn’t required.
- CM/CMG: General purpose; may be fine for short in-room runs, but check local code.
In many U.S. homes without shared air-handling plenum spaces, CMR riser-rated cable is a smart, compliant default. When in doubt, consult local building codes or a licensed electrician/low-voltage pro.
Tools and materials checklist
- Bulk cable: Cat6 or Cat6a, solid copper, CMR or CMP as needed.
- Keystone jacks: Rated for your cable category (Cat6/Cat6a). Tool-less or punch-down.
- Patch panel (optional but recommended for a central hub).
- Wall plates and low-voltage mounting brackets.
- Fish tape or fiberglass rods, pull string.
- Punch-down tool (if not using tool-less jacks).
- Cable tester; ideally a qualifier for 10G if deploying Cat6a.
- Cable staples or Velcro ties (use low-tension ties; avoid crushing the cable).
- Label maker for ports and cables.
- Network gear: Gigabit/10G switch, router, and patch cords.
Planning your topology
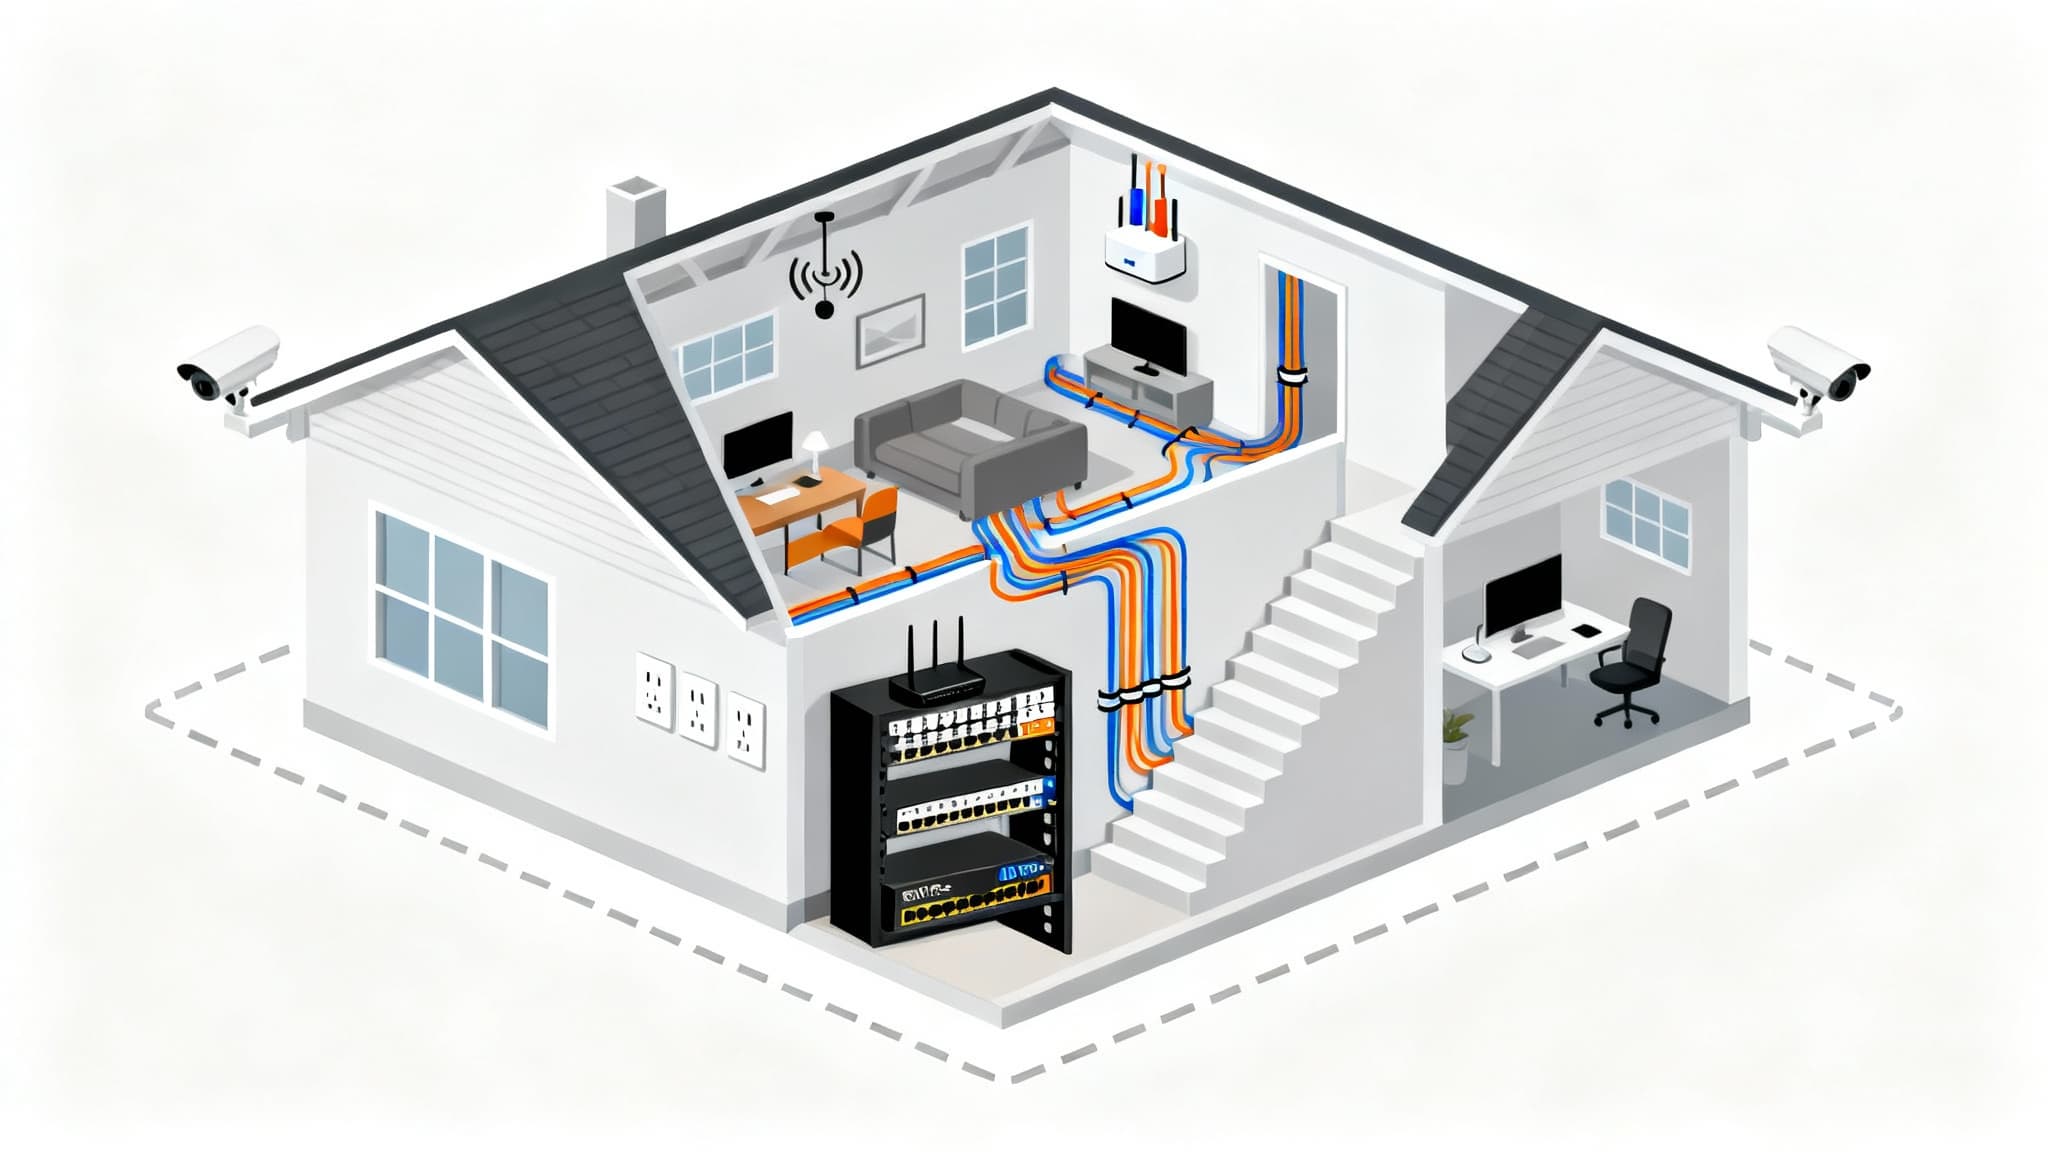
- Centralize your network hub:
- Choose a structured media panel, closet, or utility area with power and ventilation.
- Terminate all in-wall runs here to a patch panel or directly into keystones.
- Map endpoints:
- Prioritize home office, living room (TV/console/streaming devices), access point locations (ceiling/walls), and stationary devices (NAS, desktop PCs).
- Plan for at least two Ethernet ports per key room to reduce reliance on switches behind TVs/desks.
- Pathways:
- Identify vertical risers (chases, closets) and horizontal routes (attic, basement, crawlspace).
- Maintain separation from electrical wiring to minimize interference; a common guideline is at least 6–12 inches and cross at 90 degrees when necessary.
- Length budget:
- Keep permanent link lengths under 90 m (295 ft); total channel length under 100 m (328 ft) including patch cords.
- Future-proofing:
- Pull an extra cable or a pull string to each location for easy upgrades later.
- Consider a few ceiling drops for PoE access points and cameras.
Running cable: best practices
- Respect bend radius:
- Typical minimum bend radius is about 4x the cable diameter (check manufacturer guidance). Avoid kinks.
- Pull tension:
- Do not exceed manufacturer’s maximum pull force; pull steadily and avoid snags.
- Avoid crushing:
- Do not use tight zip ties or heavy staples. Use Velcro and low-voltage staples designed for data cable.
- Distance from interference:
- Keep away from fluorescent ballasts, motors, and parallel runs next to AC lines. If you must run parallel, consider shielded Cat6a.
- Firestopping:
- When drilling through fire-blocks, seal penetrations with an appropriate firestop compound where required by code.
- Drilling:
- Use appropriate bit sizes, avoid structural elements like joists’ edges, and obey building codes (e.g., protect with nail plates when near stud faces).
- Label everything:
- Label both ends with room and port numbers. Maintain a spreadsheet or panel diagram.
Termination and jack choice
- Keystone jacks vs. RJ45 plugs:
- For in-wall solid cable, terminate to keystone jacks or a patch panel, not directly to RJ45 plugs.
- T568A vs. T568B:
- Choose one standard and stick with it across the home. T568B is commonly used in the U.S., but either is fine if consistent.
- Punch-down technique:
- Untwist pairs only as much as needed (ideally less than 0.5 inch of untwist). Pair integrity affects performance, especially at higher frequencies.
- Shielded terminations (for Cat6a STP/FTP):
- Use matching shielded jacks, ensure proper drain continuity, and bond to ground per manufacturer instructions.
Testing and validation
- Basic continuity testers:
- Verify pinout, opens/shorts, and split pairs. check.
- Qualification/certification:
- If you’re targeting 10G or have long runs/Cat6a shielded links, a more advanced tester can qualify performance and identify crosstalk issues.
- Channel vs. permanent link:
- Test your permanent link first (in-wall run terminated at jacks). Then confirm full channel performance with patch cords connected.
Patch cords and switching gear
- Use factory-made stranded patch cords rated for Cat6/Cat6a to connect devices to wall jacks and patch panels to switches.
- Switch selection:
- For most homes, a quality Gigabit switch with a few 2.5G/10G uplinks is cost-effective.
- If you need multi-gig to desktops or NAS, consider 2.5G/5G/10G switches.
- PoE planning:
- Power access points, cameras, or VoIP phones with PoE+ or PoE++.
- Check total power budget and cable category for thermal guidelines; Cat6a handles PoE heat better over long bundles.
Managing Wi‑Fi alongside Ethernet
- Ethernet enables ideal access point placement via ceiling drops. Hardwire APs to reduce backhaul congestion and improve whole-home coverage.
- Use multiple APs for larger homes, each fed by Cat6/Cat6a and powered by PoE for clean installs.
A simple room-by-room example
- Living room: 2–4 ports (TV, streaming device, game console, set-top box).
- Office: 2–4 ports (desktop, VoIP, printer, spare).
- Bedrooms: 1–2 ports (TV/streaming, workstation).
- Hallway ceiling: 1 port (access point) per floor.
- Exterior eaves/entry: 1–2 ports for PoE cameras (use outdoor-rated cable or conduit).
Safety and code consciousness
- Turn off power when working near electrical lines.
- Use low-voltage brackets and avoid sharing electrical boxes with mains wiring.
- Follow NEC guidance and local amendments; use riser or plenum cable where required.
- When unsure, consult a licensed low-voltage installer.
Cost and time expectations (U.S. context)
- Cable: Cat6 CMR bulk reels are typically affordable; Cat6a costs more and can extend termination time.
- Jacks, plates, panel: Budget per port for quality components.
- Tools and tester: One-time investments; you can rent advanced testers if needed.
- Labor: A typical 8–16 port install in a single-family home may take a weekend for a careful DIYer.
Troubleshooting tips
- No link or flapping connection:
- Re-terminate jacks; check for split pairs, excessive untwist, or damaged cable.
- Slow speeds:
- Verify device NIC settings, switch port configuration, and cable test results. For 10G, ensure Cat6a and shorter runs—or accept 2.5G/5G as a practical upgrade.
- Interference:
- Increase separation from electrical lines, switch to shielded Cat6a for noisy paths, and ensure proper grounding.
Future-proofing considerations
- If you have the walls open, run extra cables and conduit. Conduit provides an easy upgrade path to new cable types later.
- Consider centralizing fiber service demarcation near your network hub for minimal ONT-to-router cable length.
- Add a small rack or wall-mount bracket for neat equipment organization and airflow.
Quick installation checklist
- Choose cable category and jacket (Cat6 vs. Cat6a, CMR/CMP).
- Plan routes, lengths, and port counts; leave service loops.
- Drill and pull with care; keep bends gentle and avoid crush points.
- Terminate with consistent T568B (or A) across all jacks.
- Label both ends and document the layout.
- Test every run before closing plates and mounting gear.
- Connect to a switch, configure PoE, and validate device throughput.
Conclusion
For U.S. homeowners, hardwiring with Cat6 or Cat6a delivers reliable speed, low latency, and strong backbone capacity for a modern smart home. With thoughtful planning, careful cable handling, and proper termination, you’ll build a network that outperforms Wi‑Fi alone and is ready for multi-gig internet and 10G local networking in the years ahead.