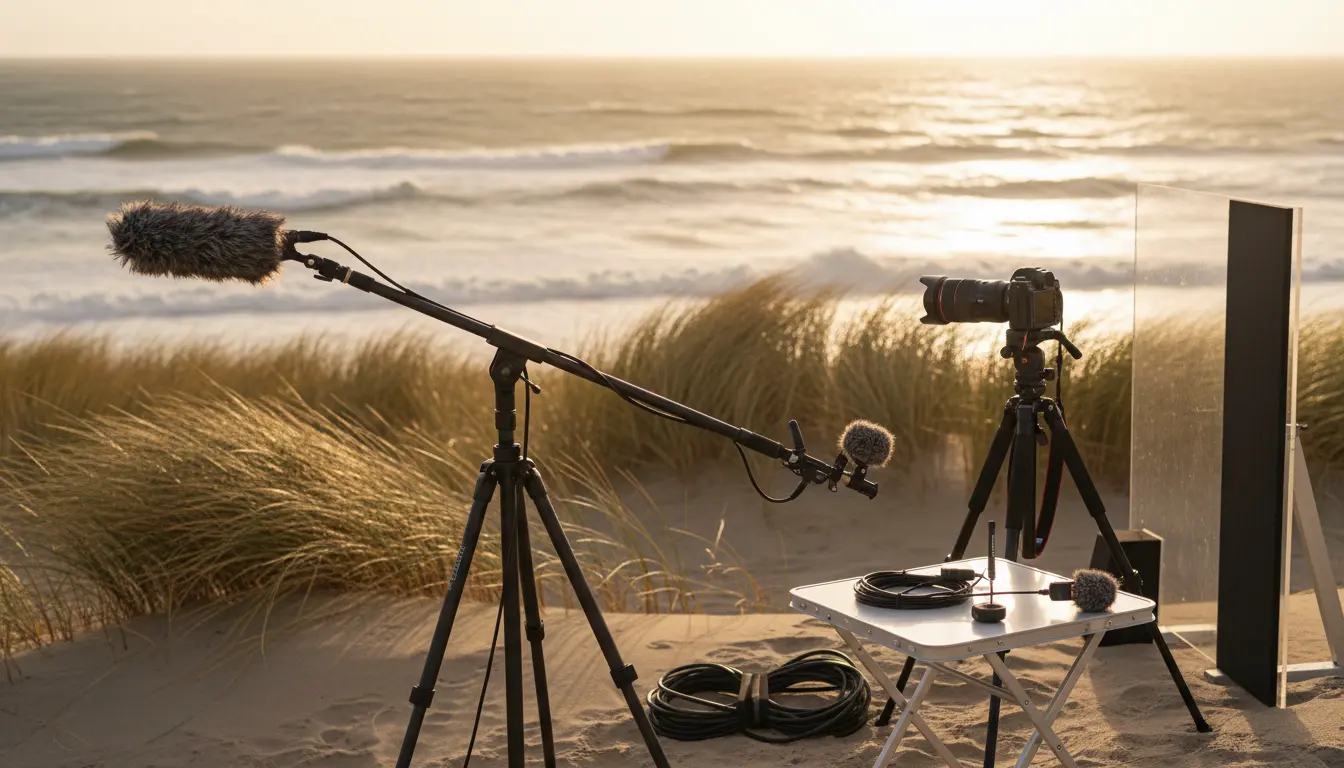

How to Reduce Wind Noise with an External Microphone
Wind noise can ruin otherwise great outdoor audio. Whether you’re vlogging on a cliffside, filming a documentary in a breezy park, or recording interviews on a city street, the low-frequency rumble and buffeting from wind can make speech unintelligible. Fortunately, with the right microphone choices, accessories, placement, and settings, you can dramatically reduce wind noise while preserving natural, clear sound. This guide walks you through practical, field-tested methods to get clean audio outdoors using external microphones.
Why Wind Noise Happens
Wind noise is caused by turbulent air interacting with the microphone capsule and grille. This turbulence translates into random pressure fluctuations, which your mic converts into low-frequency energy—what you hear as rumble or “whooshing.” Directional mics with ports (like shotguns) are especially susceptible because airflow across the interference tube creates additional turbulence. Managing airflow and controlling low frequencies are the core strategies for mitigation.
Choose the Right Microphone for the Job
- Lavalier (Lapel) Microphones: Great for speech because you can hide them under clothing or specialized wind protection, reducing exposure. Omnidirectional lavs are less sensitive to handling noise and off-axis wind but still need wind protection.
- Shotgun Microphones: Highly directional and ideal for isolating a subject at a distance. However, they are more vulnerable to wind and require robust windshields (blimps and deadcats).
- Dynamic vs. Condenser: Dynamics are generally less sensitive to environmental noise and wind but may require more preamp gain. Condensers capture more detail but need better wind control.
- On-Camera vs. Boom: On-camera mics are convenient but often sit in the wind. A boomed mic with proper shielding and strategic placement typically yields cleaner results.
Essential Wind Protection Accessories
- Foam Windscreen: Offers basic protection against gentle breezes and plosives. Often insufficient in moderate-to-strong wind but useful as the first layer.
- Deadcat / Furry Windshield: A synthetic fur cover that disrupts airflow before it reaches the mic grille. A must-have for outdoor shooting; works far better than foam alone.
- Blimp (Zeppelin) System: A rigid, aerodynamically shaped enclosure surrounding the mic, often paired with a furry cover. This is the gold standard for windy environments and for shotgun mics.
- Lavalier Wind Protection: Use mini foam + furry lav covers (e.g., “lav deadcats”) or professional windjammers. For extreme wind, a lav in a Rycote Overcover or Bubblebee Windbubble can be a game-changer.
- Shock Mounts: While not directly for wind, shock mounts reduce handling noise and cable-borne rumble, which often compounds wind issues.
Mic Placement and Positioning Techniques
- Shield with Your Environment: Place the mic downwind of the talent’s head or body, buildings, trees, or vehicles. Even partial shielding can reduce turbulence dramatically.
- Angle the Mic: Slightly off-axis positioning can reduce direct airflow across the capsule while still capturing the subject clearly.
- Shorten the Distance: Closer miking raises the signal of your subject relative to the wind noise. A well-placed lav or boomed mic just out of frame beats a distant on-camera mic every time.
- Hide Lavs Smartly: Thread the lav under a shirt or jacket flap and use fabric to break up airflow. Use tape mounts (e.g., moleskin + gaffer tape) to reduce rustle, and keep the capsule slightly away from rubbing points.
Camera and Recorder Settings That Help
- Engage Low-Cut (High-Pass) Filters: Set the cutoff around 80–100 Hz for speech; go higher (120–160 Hz) if wind is severe, but beware of thinning out voices. Many mics and recorders offer switchable filters—use them.
- Conservative Gain Staging: Wind gusts cause sudden peaks. Record with headroom (e.g., peaks around −12 dBFS), and if available, use dual-recording/safety track features with a −10 dB or −12 dB lower backup.
- Limiters and Auto Levels: Gentle limiting can catch spikes, but avoid aggressive auto-gain that pumps background noise. Manual levels with a safety track is often best.
- Use Proper Bit Depth: Record at 24-bit to preserve dynamics and give yourself more latitude in post.
Practical Field Techniques
- Test Before the Take: Do a quick run-and-gun wind test and listen on closed-back headphones. Adjust filters, positioning, and covers until buffeting is minimized.
- Layer Protections: Foam + furry + blimp (for shotguns) is a proven combo. For lavs, foam + fur + strategic clothing placement works wonders.
- Cable Management: Reduce flutter noise by securing cables and avoiding loose loops that can slap or vibrate in wind.
- Portable Wind Blocks: Carry a collapsible flag, jacket, or small windshield fabric to create a wind shadow when there’s no natural cover.
Post-Production Cleanup
- High-Pass EQ: Start with a steep HPF to remove sub-bass rumble. Then sculpt with a gentle low-shelf to taste.
- Dynamic EQ/Multiband Compression: Tame intermittent low-frequency bursts without dulling the whole track.
- Spectral Repair/De-wind Tools: Specialized tools in iZotope RX, Cedar, or Accusonus can attenuate wind artifacts. Use sparingly to avoid artifacts.
- Noise Reduction with Care: Broadband NR can help with residual hiss after HPF, but overuse can make voices sound underwater. Always A/B compare.
Equipment Recommendations and Considerations
- Invest in Quality Windshields: A well-fitted deadcat matched to your mic model performs far better than generic options that don’t seal properly.
- Blimps for Shotguns: If you shoot outdoors regularly, a blimp kit is one of the best ROI purchases.
- Reliable Lavalier Kits: Choose lavs with comprehensive wind accessory ecosystems. Ensure you can get spare foams, furries, and adhesive mounts easily.
- Weather-Resistant Mounting: Keep silica gel packs and protective pouches. Moisture plus wind can create crackle; keep gear dry between takes.
Common Mistakes to Avoid
- Using Only Foam in Strong Wind: Foam alone won’t cut it beyond a light breeze.
- Over-EQ in the Field: Rely on physical wind control first. Extreme EQ to fix wind can make voices thin or phasey.
- Ignoring Monitoring: If you’re not actively monitoring with headphones, you won’t catch wind gusts until it’s too late.
- Mounting Lavs on Flimsy Fabric: Wind plus loose fabric equals constant rustle. Prefer stable, thicker mounting points.
Workflow Checklist for Outdoor Audio
- Fit the correct wind protection (foam + furry; blimp for shotguns).
- Scout for wind shadows; position talent and mic downwind.
- Set HPF at 80–120 Hz, record 24-bit with safety track.
- Monitor with headphones and adjust gain for headroom.
- In post, use high-pass + gentle dynamic control, then surgical tools if needed.
By combining these methods—proper mic choice, robust wind protection, smart placement, and sensible settings—you can capture clear, intelligible audio even in challenging outdoor conditions.