
Ring Flash and Video Lights: Phone Content-Creation Setups That Actually Work
In the creator economy, great lighting turns ordinary phone footage into content that feels polished and professional. Whether you shoot daily vlogs, product demos, makeup tutorials, or short-form social clips, choosing the right ring flash or video light and placing it correctly will elevate image quality, reduce post-production effort, and help your videos stand out in crowded feeds. This guide explains practical setups, lighting techniques, and accessory choices for phone-based creators who want consistent, organic-looking results.
Why lighting matters for phone creators
Phone cameras have improved dramatically, but they still rely on proper lighting to capture color, detail, and depth. Poor lighting creates noise, harsh shadows, and flattened features. A ring flash (or ring light) offers soft, even illumination often favored for beauty content because it minimizes facial shadows and creates a flattering circular catchlight in the eyes. Continuous video lights provide sustained light for motion, giving you consistent exposure while recording and making it easier to balance background and subject.
Ring flash vs. video light: which to choose?
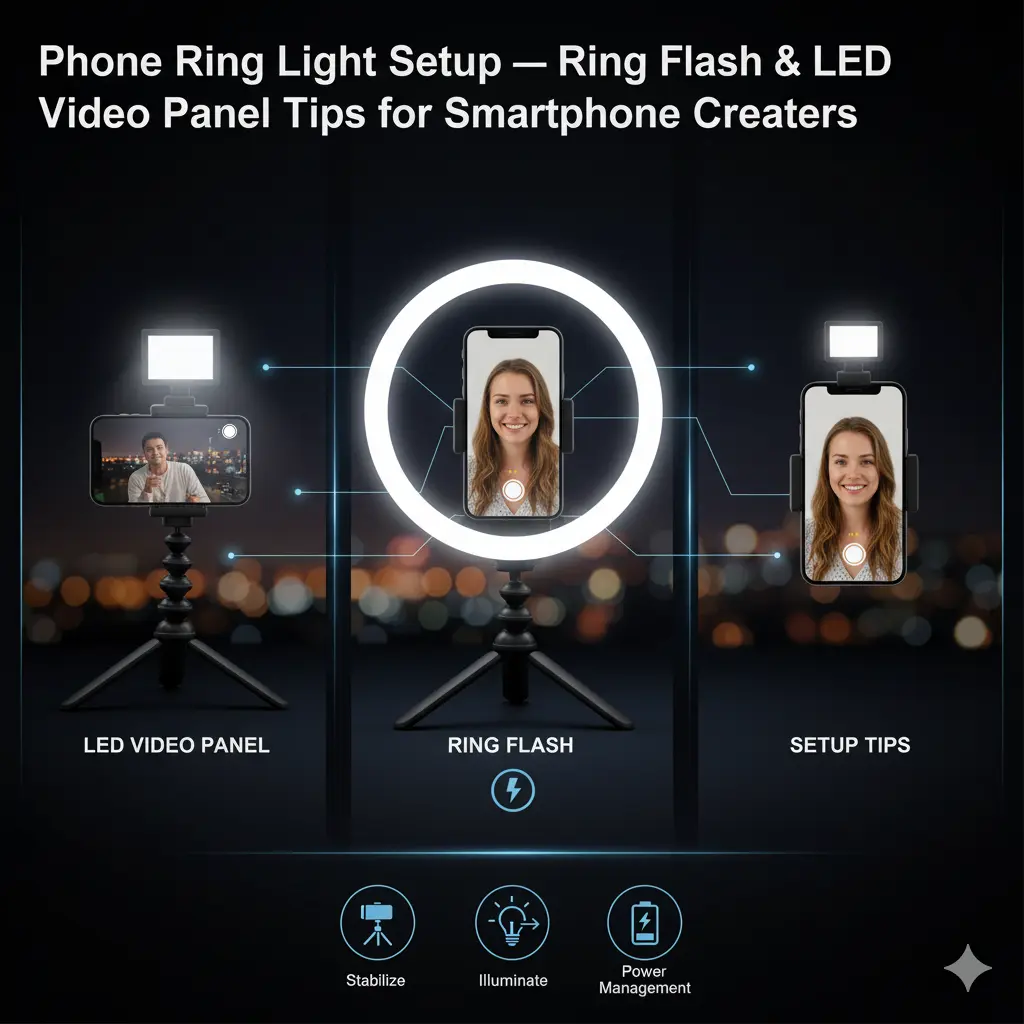
- Ring flash (ring light): Best for selfies, beauty tutorials, close-ups, and when you want a soft, even glow. Many ring lights include adjustable brightness and color temperature, making them versatile for different skin tones and moods.
- Video light (panel light): Better for interviews, full-body shots, multi-subject scenes, and when you need directional control. LED panels often offer higher output and better diffusion options; they can be mounted on stands or booms for creative lighting angles.
- Hybrid approach: Use a ring light as your key light and a small LED panel as a fill or rim light to sculpt depth. This combination produces studio-like results while staying portable.
Key features to look for
- Color temperature control (bi-color): Being able to switch between warm and cool light (e.g., 2700K–6500K) helps match ambient light and achieve natural skin tones.
- CRI/TLCI rating: Choose lights with a CRI of 90+ for accurate color rendering—this reduces post-correction time.
- Dimming range: Smooth brightness control avoids abrupt exposure jumps when adjusting mid-shoot.
- Power options: Battery-powered lights increase mobility; AC-powered units are better for long sessions.
- Size and mounting: For phone creators, compact ring lights and small panels with smartphone mounts or cold-shoe adapters are ideal.
Phone setup and placement tips
- Mounting: Use a sturdy phone holder attached to the ring light or a tripod. Make sure the phone is level and secure.
- Key light position: Place the ring or panel slightly above eye level and tilted downward at about 15–30 degrees for natural falloff and flattering shadows. For full-body shots, raise the light and tilt it more steeply.
- Distance: Closer light gives softer illumination but may overexpose highlights. Start at 2–4 feet and adjust while monitoring exposure on your phone screen.
- Fill and rim lights: Add a weaker fill light opposite the key to soften shadows. Use a back or rim light to separate the subject from the background and add dimension.
- Background balance: If the background appears too dark or blown out, use a background light or lower your key’s intensity to keep the scene cohesive.
Controlling color and mood
- Match ambient lighting: If shooting in mixed light (window + artificial), set your video light’s color temperature to match the dominant source to avoid white-balance shifts.
- Creative gels and filters: Small diffusion panels or color gels let you introduce warm or cool accents safely. For phone creators, clip-on gels or magnetic filters are a lightweight option.
- White balance: Lock white balance in your phone app when possible to avoid flicker from automatic adjustments during a clip.
Diffusion and softness
- Built-in diffusers: Many ring lights and panels ship with removable diffusers to soften shadows. Use them for beauty and product close-ups.
- DIY diffusion: Use a thin white cloth or tracing paper at a safe distance as an improvised diffuser when needed—but ensure heat safety if the light isn’t LED.
- Feathering technique: Slightly offset the light so the edge of the fixture—rather than the brightest center—falls on the subject. This produces softer, more flattering illumination.
Power, portability, and battery life
- Battery-powered units: Look for battery life specs in hours at mid or full brightness. For longer shoots, bring spare batteries or a power bank that’s compatible.
- Fast charging and USB power: Many LED panels accept USB-C power banks—handy for outdoor shoots where AC power isn’t available.
- Weight and build: Aluminum frames offer durability without too much weight; plastic mounts help reduce cost but may wobble on tall stands.
Stabilization and support
- Tripod and boom stands: A compact tripod for the phone and a separate light stand for the panel or ring light give flexibility. A boom arm helps achieve overhead angles without visible stands in frame.
- Clamp mounts and cold-shoe adapters: These allow you to attach microphones or smaller lights directly to the phone rig for a compact setup.
Apps, exposure, and camera settings
- Manual control apps: Use apps that allow manual exposure, ISO, and shutter speed control to lock in consistent settings across clips.
- Exposure compensation: When your phone’s auto-exposure fights the light, lock exposure or slightly underexpose to preserve highlights.
- Log vs. standard capture: For creators who grade footage, capture in the flattest profile available to keep color grading flexible.
Content-specific recommendations
- Beauty and tutorials: Use a ring light as the key at close range, add a soft fill from a small panel, and keep color temperature between 3200K–4500K for a natural look.
- Product demos: Increase backlight or rim light to define edges and add a soft fill from the front. Micro-focus on details with controlled light angles to avoid reflections.
- Talking-head videos: Use a three-point lighting approach—key (ring or panel), fill (weaker panel), and backlight—to create depth and professional polish.
Troubleshooting and common mistakes
- Hotspots and glare: If you see shiny patches, reduce intensity or increase diffusion. For glossy products, change angle to avoid mirror-like reflections.
- Flickering: Match the light frequency and color temp with your phone’s shutter and use high-quality LED drivers. Locking exposure and white balance helps.
- Overreliance on post-production: Good lighting reduces time spent color-grading and fixing noise. Aim to capture clean footage rather than fixing it later.
Final workflow tips
- Test and mark positions: Once you find the ideal light and phone positions, mark them on the floor for quick repeatability.
- Shoot a short clip and review on a calibrated monitor or good-quality phone screen before recording long takes.
- Keep a small kit: A foldable reflector, mini tripod, spare battery, and a basic diffusion cloth make quick setups faster and more adaptable.
Good lighting is the single most impactful upgrade for phone-based creators. Choosing between a ring flash and video lights comes down to the content style, mobility needs, and the level of control you want. Start with a versatile bi-color ring or a compact LED panel, learn to feather and diffuse light, and build a simple three-point setup to make your videos feel intentional and high-quality. Consistent, natural lighting not only improves viewer retention but also strengthens your brand’s visual identity across platforms.