
Ceiling Atmos Speakers for Home Cinema: The Ultimate Immersive Sound Upgrade
Creating a true home cinema is not just about buying a big TV or projector. The real magic happens when sound surrounds you from every direction – including from above. That is where ceiling Atmos speakers come in. By adding height channels to your audio system, you transform a flat, front-focused soundstage into a three-dimensional sound bubble that pulls you right into the movie.
In this article, you will learn what ceiling Atmos speakers are, how they work, what you need to install them, and how to choose the right models for your room. You will also see why they are one of the most effective upgrades for any home theater enthusiast who wants cinematic, immersive audio at home.
What Are Ceiling Atmos Speakers?
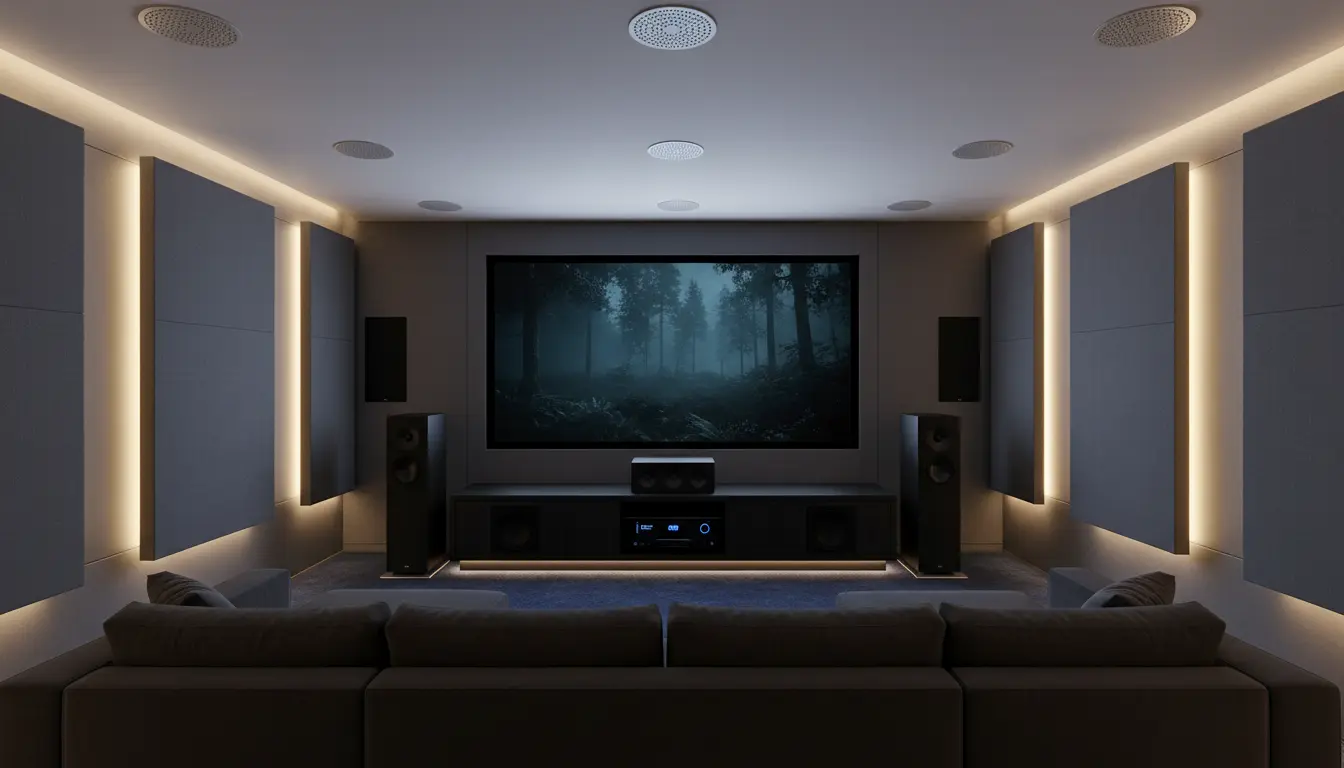
Ceiling Atmos speakers are dedicated height-channel speakers used in Dolby Atmos and other object-based surround sound formats. Unlike traditional surround speakers that sit at ear level, these speakers are mounted in or on the ceiling above the listening position.
Dolby Atmos uses sound objects instead of only fixed channels. This means the soundtrack can place audio effects anywhere in a 3D space. Ceiling speakers reproduce these height effects accurately, so you hear helicopters flying overhead, rain falling from above, and ambient sounds that fully envelop you.
Many AV receivers support Atmos layouts such as 5.1.2, 5.1.4, 7.1.2, or 7.1.4, where the last digit refers to the number of height speakers. In-ceiling Atmos speakers are typically used as the “.2” or “.4” channels in these configurations.
Ceiling Atmos vs Up-Firing Atmos Speakers
When adding height channels, you have two main options: dedicated ceiling speakers or up-firing Atmos-enabled modules that sit on top of your existing speakers and bounce sound off the ceiling.
Up-firing speakers can work well in some rooms, but ceiling Atmos speakers have clear advantages:
- More precise sound placement: Because the sound comes directly from the ceiling, localization is more accurate.
- Less dependent on room surfaces: Up-firing speakers need a flat, reflective ceiling at the correct height. In-ceiling speakers are more flexible.
- Cleaner look: Many in-ceiling models sit flush with the ceiling, creating a minimal, discreet home cinema design.
- Better immersion: True overhead channels surround you with a dome of sound that feels closer to commercial cinema systems.
If you can run speaker cables and cut holes in the ceiling, hard-mounted Atmos ceiling speakers are generally the best long-term solution.
Key Benefits of Using Ceiling Atmos Speakers at Home
Adding ceiling Atmos speakers to your home cinema brings several important benefits:
- True 3D Immersive Audio
Height channels create a sound bubble around the listener. Instead of hearing effects only from the front and sides, you experience audio coming from above as well. This dramatically increases realism and emotional impact. - More Engaging Movies, Games, and Streaming
Modern Blu-rays, 4K UHD discs, and many streaming platforms include Dolby Atmos soundtracks. With a proper home theater Atmos setup, you hear the mix exactly as the sound designers intended. Action scenes, atmospheric moments, and even quiet dialogue scenes become more engaging. - Better Soundstage and Separation
Ceiling Atmos speakers help separate different layers of audio. Music, effects, and ambient soundscapes gain more space. In complex scenes, you can still clearly identify individual sounds because they are distributed across the horizontal and vertical plane. - Higher Perceived Value of Your Home Cinema
A home cinema with ceiling Atmos speakers feels premium. It can increase the perceived value of your entertainment space and makes your system stand out from a typical TV soundbar setup.
Planning Your Home Theater Atmos Layout
Before installing ceiling Atmos speakers, spend time planning the layout. Proper positioning is critical for natural, coherent sound.
Choose the Right Number of Height Channels
- 5.1.2 – Great entry-level Atmos layout with two ceiling speakers placed above or slightly in front of the main listening position.
- 5.1.4 – Four ceiling Atmos speakers, two in front and two behind the listener, deliver more precise overhead effects and a more continuous sound dome.
- 7.1.4 – Ideal for larger dedicated home theater rooms with extra surround speakers at ear level and four overhead speakers.
Your choice depends on room size, budget, and AV receiver capabilities. Many enthusiasts start with 5.1.2 and later upgrade to 5.1.4 once they experience the improvement.
Placement Guidelines for Ceiling Atmos Speakers
For a typical rectangular room:
- Mount the front height speakers slightly in front of the main seating position, roughly in line with the front left and right channels.
- If using four speakers, place the rear height speakers slightly behind the seating position.
- Try to keep the angles between 30° and 55° from the listening position vertically, as recommended by Dolby.
- Aim for symmetrical placement left-to-right for a balanced sound field.
If you use angled in-ceiling speakers with pivoting tweeters, you can direct the sound toward the seating area instead of straight down, improving clarity and imaging.
Choosing the Right Ceiling Atmos Speakers
There are many ceiling Atmos speaker options on the market, from budget in-ceiling speakers to high-end audiophile models. Consider the following factors when choosing:
1. Speaker Design and Driver Size
- Two-way or three-way: Two-way models with a woofer and tweeter are common and usually sufficient for height channels. Three-way models may offer better clarity and bandwidth.
- Woofer size: 6.5-inch woofers are a popular choice, offering a good balance between bass extension and compact size. For small rooms, even 5.25-inch drivers can work well as Atmos ceiling speakers.
2. Angled or Pivoting Tweeters
Because height speakers often sit directly above or slightly offset from the listening area, angled baffles or pivoting tweeters are extremely helpful. They allow you to aim high frequencies at the main listening position, improving detail and dialogue intelligibility.
3. Power Handling and Sensitivity
Match the speakers to your AV receiver’s power output. Height channels typically do not require as much power as front mains or subwoofers, but efficient speakers (with higher sensitivity) will still perform better, especially at cinematic volume levels.
4. Build Quality and Installation Features
Look for:
- Sturdy frames and quality crossover components
- Easy-mount clamps for drywall or plaster ceilings
- Magnetic grilles that can be painted to blend with your ceiling
Durable build quality is especially important if your home theater is in a room with temperature or humidity fluctuations, such as a loft or basement.
Installation Tips for Ceiling Atmos Speakers
Installing ceiling Atmos speakers can be a DIY project if you are comfortable with basic tools and working overhead. However, for complex rooms or if you are unsure about wiring and safety, consider hiring a professional installer. If you do it yourself, follow these tips:
- Check for Obstructions
Before cutting any holes, use a stud finder and inspection camera if possible to check for joists, pipes, and electrical lines. - Use a Template
Most in-ceiling speakers include a cutout template. Tape it to the ceiling, ensure correct positioning and symmetry, and trace the outline before cutting. - Run High-Quality Speaker Cable
Use CL2 or CL3-rated in-wall speaker cable that meets fire safety codes. Plan the cable runs from your AV receiver to each ceiling Atmos speaker location. - Seal and Isolate Where Possible
If you want better bass and reduced sound leakage to other rooms, consider back-boxes or enclosures for the speakers. This gives the drivers a defined volume of air and can improve consistency. - Calibrate with Your AV Receiver
After installation, run your AV receiver’s room correction system (such as Audyssey, YPAO, or Dirac Live). This helps time-align and level-match the ceiling Atmos speakers with your other channels for a seamless sound field.
Matching Your Atmos Ceiling Speakers with the Rest of the System
For the best results, treat your ceiling Atmos speakers as part of a complete ecosystem rather than as an add-on. Try to:
- Use the same brand family as your front and surround speakers when possible. This improves tonal consistency.
- Set appropriate crossover points in your AV receiver, typically around 80–100 Hz for in-ceiling speakers, offloading deep bass to your subwoofer.
- Balance aesthetics and performance by choosing slim, paintable grilles that integrate with your ceiling while still delivering strong, clear sound.
With thoughtful selection and integration, your height channels will feel like a natural extension of your main home theater Atmos setup.
Recommended Ceiling Atmos Speaker on Amazon
If you are ready to start with a reliable, well-reviewed option, you can look at the Polk Audio RC80i In-Ceiling Speakers on Amazon. They are popular in many home cinema Dolby Atmos installations thanks to their solid build quality, moisture resistance, and easy installation. Combined with a capable AV receiver and properly tuned home theater system, they can deliver impressive overhead effects and genuinely immersive surround sound.